How to send a Mailshot
Introduction
This tutorial will show you how to send a letter to multiple people from our Mailshot interface, before following the steps in this tutorial, you will need to ensure you have uploaded an address list first. If you have not done so, first upload your address list and then come back to this tutorial.
The Mailshot interface enables you to send a letter to multiple people using our online editor. In addition to using our online editor you can also attach PDF documents to your letter as additional pages. If you would like to just send the same PDF to multiple people and not use the online editor this is also possible from the Mailshot interface.
If you have mail merged your letter using MS Word we have an MS Word Mailmerge interface you can read more about here.
Step 1: Select the Mailshot interface
Log into your PC2Paper account and go to the Write a letter menu, from here select the Mailshot option
Step 2: Give your mailshot a name and return address
When the Mailshot interface appears, give your mailshot a name and provide a return address. This will be printed on the envelopes of your mailing and used as a return address for your letters if they cannot be delivered by the postal service.
After you have named your mailshot and provided a return address click on the Add Address button.
Step 3: Select your addresses
In this step you can select the addresses you would like to send your mailshot to. This tutorial assumes you have already uploaded an address list as demonstrated in the Upload Your Address List tutorial. In the following example we have selected all addresses from an address list called "My Address List 1".
NOTE: If you can't see some of the buttons on the Address Book below. Check the Zoom level in your web browser. In Chrome you can get to this by clicking on the 3 dots in the top right hand corner of your browser and select the zoom level from the menu that appears. Ensure this is set to 100%
Step 4 : Choose if you wish to use the online editor
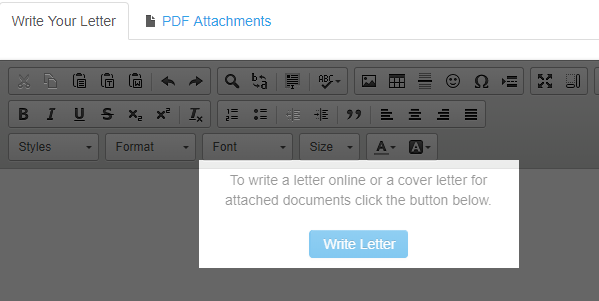
After you have selected your addresses scroll down the page and decide if you wish to use the online editor by clicking the "Write Letter" button (shown below). The online editor enables you to write your letter online. You can also attach PDF documents to the letter you write online. Alternatively, if you only want to send PDF documents to your mailshot ignore the dialogue you are presented with below and click on the PDF Attachments tab.

Step 4a: Using the online editor
Some of the functions the online editor provides which you may find useful is (as illustrated in the image below):
- Insert images You could use this to insert a letter head on your letter
- Insert page breaks If you would like parts of your letter to be on separate pages
- Insert mail merge field You can use this to personalise each letter in your mailshot as shown in the image below.
Step 5 : Attach PDFs
You can attach PDFs without using the online editor (as discussed in previous steps) or you can use the online editor and attach PDF's to your mailing. The letter produced by the online editor will be used as a cover page for any PDFs you attach to your mailshot. To attach PDF's select the "PDF Attachments" tab. One selected click the "Attach PDF" button.
Step 6 : Preview your mailing
After you have completed your letter you can preview it by clicking the preview buttons located at the bottom and very top of the screen. You can see from the image below that because we inserted fields into our letter, each one is personalised.
Step 7 : Send your mailshot
When you are happy with your preview, close the preview and click on the Send button. You will then be presented with the postage options for your letter. When you are happy with your postage options hit the Send button.


